Specifications
Interface : WiFi
Titration channel : 1 KFS pump head
Titration flow : 70ml/min
Volume range : 0.1ml-9999ml
Voltage : Input : 100VAC-240VAC / Output : DC12V/2A
Dimensions : 10 cm x 9.2 cm x 6.3 cm
Weight : 316g
User manual
Reading Tips
FCC Warning
This device complies with Part 15 of the FCC Rules and must not cause harmful interference and accept any interference received. It has been tested and classified as a Class B digital device according to FCC rules. Although this device generates radio frequency energy, it may cause harm to radio communications if not used according to instructions. If it causes interference to radio or TV reception, the user can try to fix it by adjusting the receiving antenna, increasing separation, connecting to a different outlet, or seeking help from a technician. Any modifications not approved by the responsible party can void the user's authority to operate the device.
The FCC requires a separation distance of at least 20 cm for the transmitter antennas to protect persons from radiation exposure. These antennas must not be co-located with any other antenna or transmitter.
User Instructions
Kamoer offers the following materials for X1 PRO T Micropump users:
X1 PRO T User Manual
It is recommended to read the Quick Start Guide first for a quick understanding of the usage process. For in-depth product information, refer to the X1 PRO T Micropump User Manual.
Download the Kamoer Remote App
Scan the QR code to download the appropriate version of the app.
Alternatively, search "Kamoer Remote" in the App Store (for iOS 9.1 and above) or Google Play (for Android 4.4 and above) to download.
To access the tutorial, go to the device list page and click the "?" icon in the upper right corner. Select "X1 PRO T" to view the user manual and frequently asked questions."
Product Description
Overview
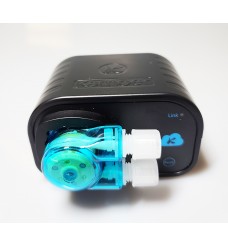
The X1 PRO T is a single-channel WIFI Micropump that can be controlled via a mobile phone app. It features a long-lasting stepping motor and can be used as a dosing pump or a calcium reactor. As a dosing pump, it can accurately and flexibly add elements such as calcium, magnesium, KH enhancer, and trace elements to a marine biological tank, reducing manual workload and minimizing potential errors. When used as a calcium reactor, it provides a stable flow of water.
Key Features
Small size and high cost-effectiveness
Supports all dosing calcium reactors with adjustable speed
Remote control through iOS and Android app
App can control multiple X1 PRO T devices
Settings remain even after power loss with a backup battery
Uses high-quality PharMed BPT pump tubing
Supports remote firmware upgrade
Applications
Marine life breeding (for dosing or calcium reaction of SPS, LPS, and SPS/LPS corals)
Plant breeding (for supplementing elements during growth)
Other occasions (for supplementing elements during growth)
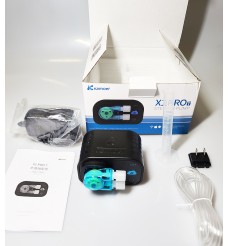
Unpacking
Before opening the packaging, inspect for damage. After opening, refer to the packing list to ensure all parts are present and inspect for any visible damage. If any defects are found, contact the manufacturer immediately."
Status Indicator Description
Blue Status Indicator
Long Light: Connected to the cloud through the router.
Off: Disconnected from the router.
Fast flashing: Router network distribution mode. App can configure the Micropump to connect to the router.
On for 200 milliseconds, off for 2 seconds: AP network configuration mode. App can configure the Micropump to connect to the router.
Slow flashing: Disconnected from the cloud.
Red Power Indicator
Long Light: Powered on.
Off: Power not connected or power failure.
Note: The X1 PRO T uses red and blue dual-color indicators. When the blue status indicator is on or flashing, the red indicator does not need to be on.
Product Installation
This chapter covers the installation process of X1 PRO T Micropump, including necessary precautions.
Warning
The Micropump is a self-priming pump, and if the difference in height between the liquid inlet and outlet is too great, it can result in siphoning or backflow.
To prevent this, the Micropump must be positioned in a way that the height difference between the liquid inlet and outlet is within 0.5 meters. The connecting pipe for the liquid should be as short as possible and elevated above the container. It's important to double-check that the connections for the liquid inlet and outlet are not reversed. Refer to the Component Connection chapter for more information.
App Usage
This chapter outlines how to use the App to control the X1 PRO T Micropump.
Connecting the Micropump to the Cloud
After unpacking, turn on the Micropump for the first time. The blue status indicator will flash slowly, indicating that the device needs to be connected to the cloud using the App and a wireless router. Follow these steps:
Open the App, click the "+" button in the top right corner of the device screen to add a device, select "KamoerX1PRO" from the list of supported devices, and enter.
Make sure that the mobile phone is connected to a Wi-Fi network that can access the internet (the device does not support 5G Wi-Fi).
Enter the Wi-Fi password, taking care not to make any mistakes, and click "Next" to proceed with device networking.
Press and hold the "Reset" button on the rear panel for more than 4 seconds, then release it. Wait for 3 seconds. The blue status indicator will flash quickly, indicating the device is now in network configuration mode. Use the App to initiate network configuration when the light is flashing quickly.
Wait for the network configuration process to complete successfully. The App will display a successful connection screen once done.
Click "Start using" on this screen to enter the device list interface. The red status indicator will now be on, indicating that the Micropump has been connected to the cloud and the binding is complete.
Note:
a. The device only needs to be connected to Wi-Fi once. After successful configuration, the device can be found in the device list as long as the App can access the internet.
b. If the device fails to connect to Wi-Fi during configuration, start the process again from step 1
Two methods are available for binding Micropump
The first method is to bind Micropump through the redistribution method mentioned above.
The second method is for Micropump to be connected to the cloud through a wireless router. In this case, the user can connect their mobile phone to the wireless router, and the app will display locally available Micropumps. The user can select the Micropump from the list and bind it by following these steps:
Open the app, click the "+" button in the upper right corner to add a device.
Enter the add device interface, select Micropump from the list of locally available devices, and click to enter.
After a successful binding, a prompt will pop up, and the user can click "Start" to return to the device list.
Micropump Control Interface
Open the app and click on Micropump in the device list to access the Micropump operation interface.
The Micropump operation interface includes running functions and settings functions:
Plan: displays the current working mode, with 3 options available:
Planning mode: allows the user to set a dosing plan and quantitatively titrate the Micropump according to the plan.
Manual mode: allows for manual, quantitative runs.
Continuous mode: runs continuously at adjustable speed, suitable for calcium reactions.
Settings: mainly used for firmware upgrades, time synchronization, flow calibration, and other functions.
Schedule Dosing-Schedule Setting Details Page
Click on the "Plan" in the bottom navigation bar to access the plan details page, which includes the following functions:
Solution bottle status setting/viewing: allows the user to view the volume of the solution bottle, remaining volume, planned daily addition amount, and number of days the remaining volume can last. The user can also set the volume of the solution bottle.
Cycle cycle: the dosing cycle can be set to weekly or every few days.
List of plan groups: displays the set plan groups and plans.
Add a plan group: creates a plan group by setting its name and time range. Up to 6 plan groups can be created.
Plan Group Creation, Editing, and Deletion
To create a plan, the user must first create a plan group or add a plan to an existing plan group. Up to 6 groups can be created.
To create a plan group
In the channel plan details page, click the "+" button in the upper right corner to enter the plan group add interface.
Set the name of the plan group.
Set the time range of the plan group, with a maximum range of 00:00 to 23:59.
Save the plan group by clicking the "Save" button.
To edit or delete a plan group
Click on the plan group to enter the edit group information interface, with parameters the same as the group creation.
Enter the plan list by clicking the drop-down button of the plan group.
Delete the plan group by sliding it to the left and clicking the delete button.
Settings page
a. Device serial number: displays the serial number of the device.
b. Current firmware version: shows the current version of the firmware. If updated, a prompt will appear.
c. Name: allows for modifying the device and pump head names for identification purposes.
d. Serial number: click to display the device serial number.
e. Update: option to update the firmware if a new release is available.
f. Tube type setting: checks and sets the lifespan and usage time of the pump tube. Typically replaced after 1000 hours.
g. Time setting: sets the real-time clock time of the firmware to ensure accurate titration plans.
h. Connect to the smart controller: sets connection to the smart controller (currently unavailable).
i. Flow rate calibration: calibrates the flow rate of each pump head to improve accuracy of additions.
j. Restore factory settings: restores firmware parameters to factory settings.
k. Delete device: unbinds the App and device.
Time setting
a. Device time: displays the current real-time clock time of the device.
b. App time: displays the current time on the phone.
c. Time synchronization: after clicking, the device time will be synced with the phone time.
Flow Calibration
a. Flow rate calibration: enter the flow rate calibration interface through the setting interface.
b. Speed: sets the speed of the pump to be calibrated.
c. Start emptying: empties air from the pump tube to ensure accuracy during calibration.
d. Long titration time: sets the running time of the pump during calibration.
e. Start titration: starts the titration process for the set duration.
f. Input volume: inputs the volume of liquid read from a measuring cylinder (in mL).
g. Calibration completed: clicks to complete the flow calibration.
Firmware Upgrade
a. Current firmware version: displays the current version.
b. New version prompt: displays if a new version is available.
c. Status after firmware update: displays status after update is completed.
To upgrade firmware, enter the App setting interface and click the update button if a new version is available. Do not perform other actions during the upgrade process. Upon completion, a long red status indicator and two buzzes will indicate success. If upgrade fails, repeat the steps.
Appendix
Technical Parameters
Dimensions: 100 x 92 x 63 mm (including pump head)
Weight: 316g (excluding power adapter)
Power Adapter:
Input: 100VAC - 240VAC
Output: DC12V 2A
Titration parameters:
Dosing channel: 1 KFS pump head
Flow rate: >70 mL/min
Number of titrations: 24 times/day - 1 time/99 days
Dosing accuracy: <±2%
Volume range: 0.1 mL - 9999.9 mL
Interface: WIFI
Working environment: Temperature 0-70℃, humidity 10%-90% (non-condensing)
Storage environment: Temperature -20℃-85℃, humidity 10%-90% (non-condensing)
After-sales warranty.